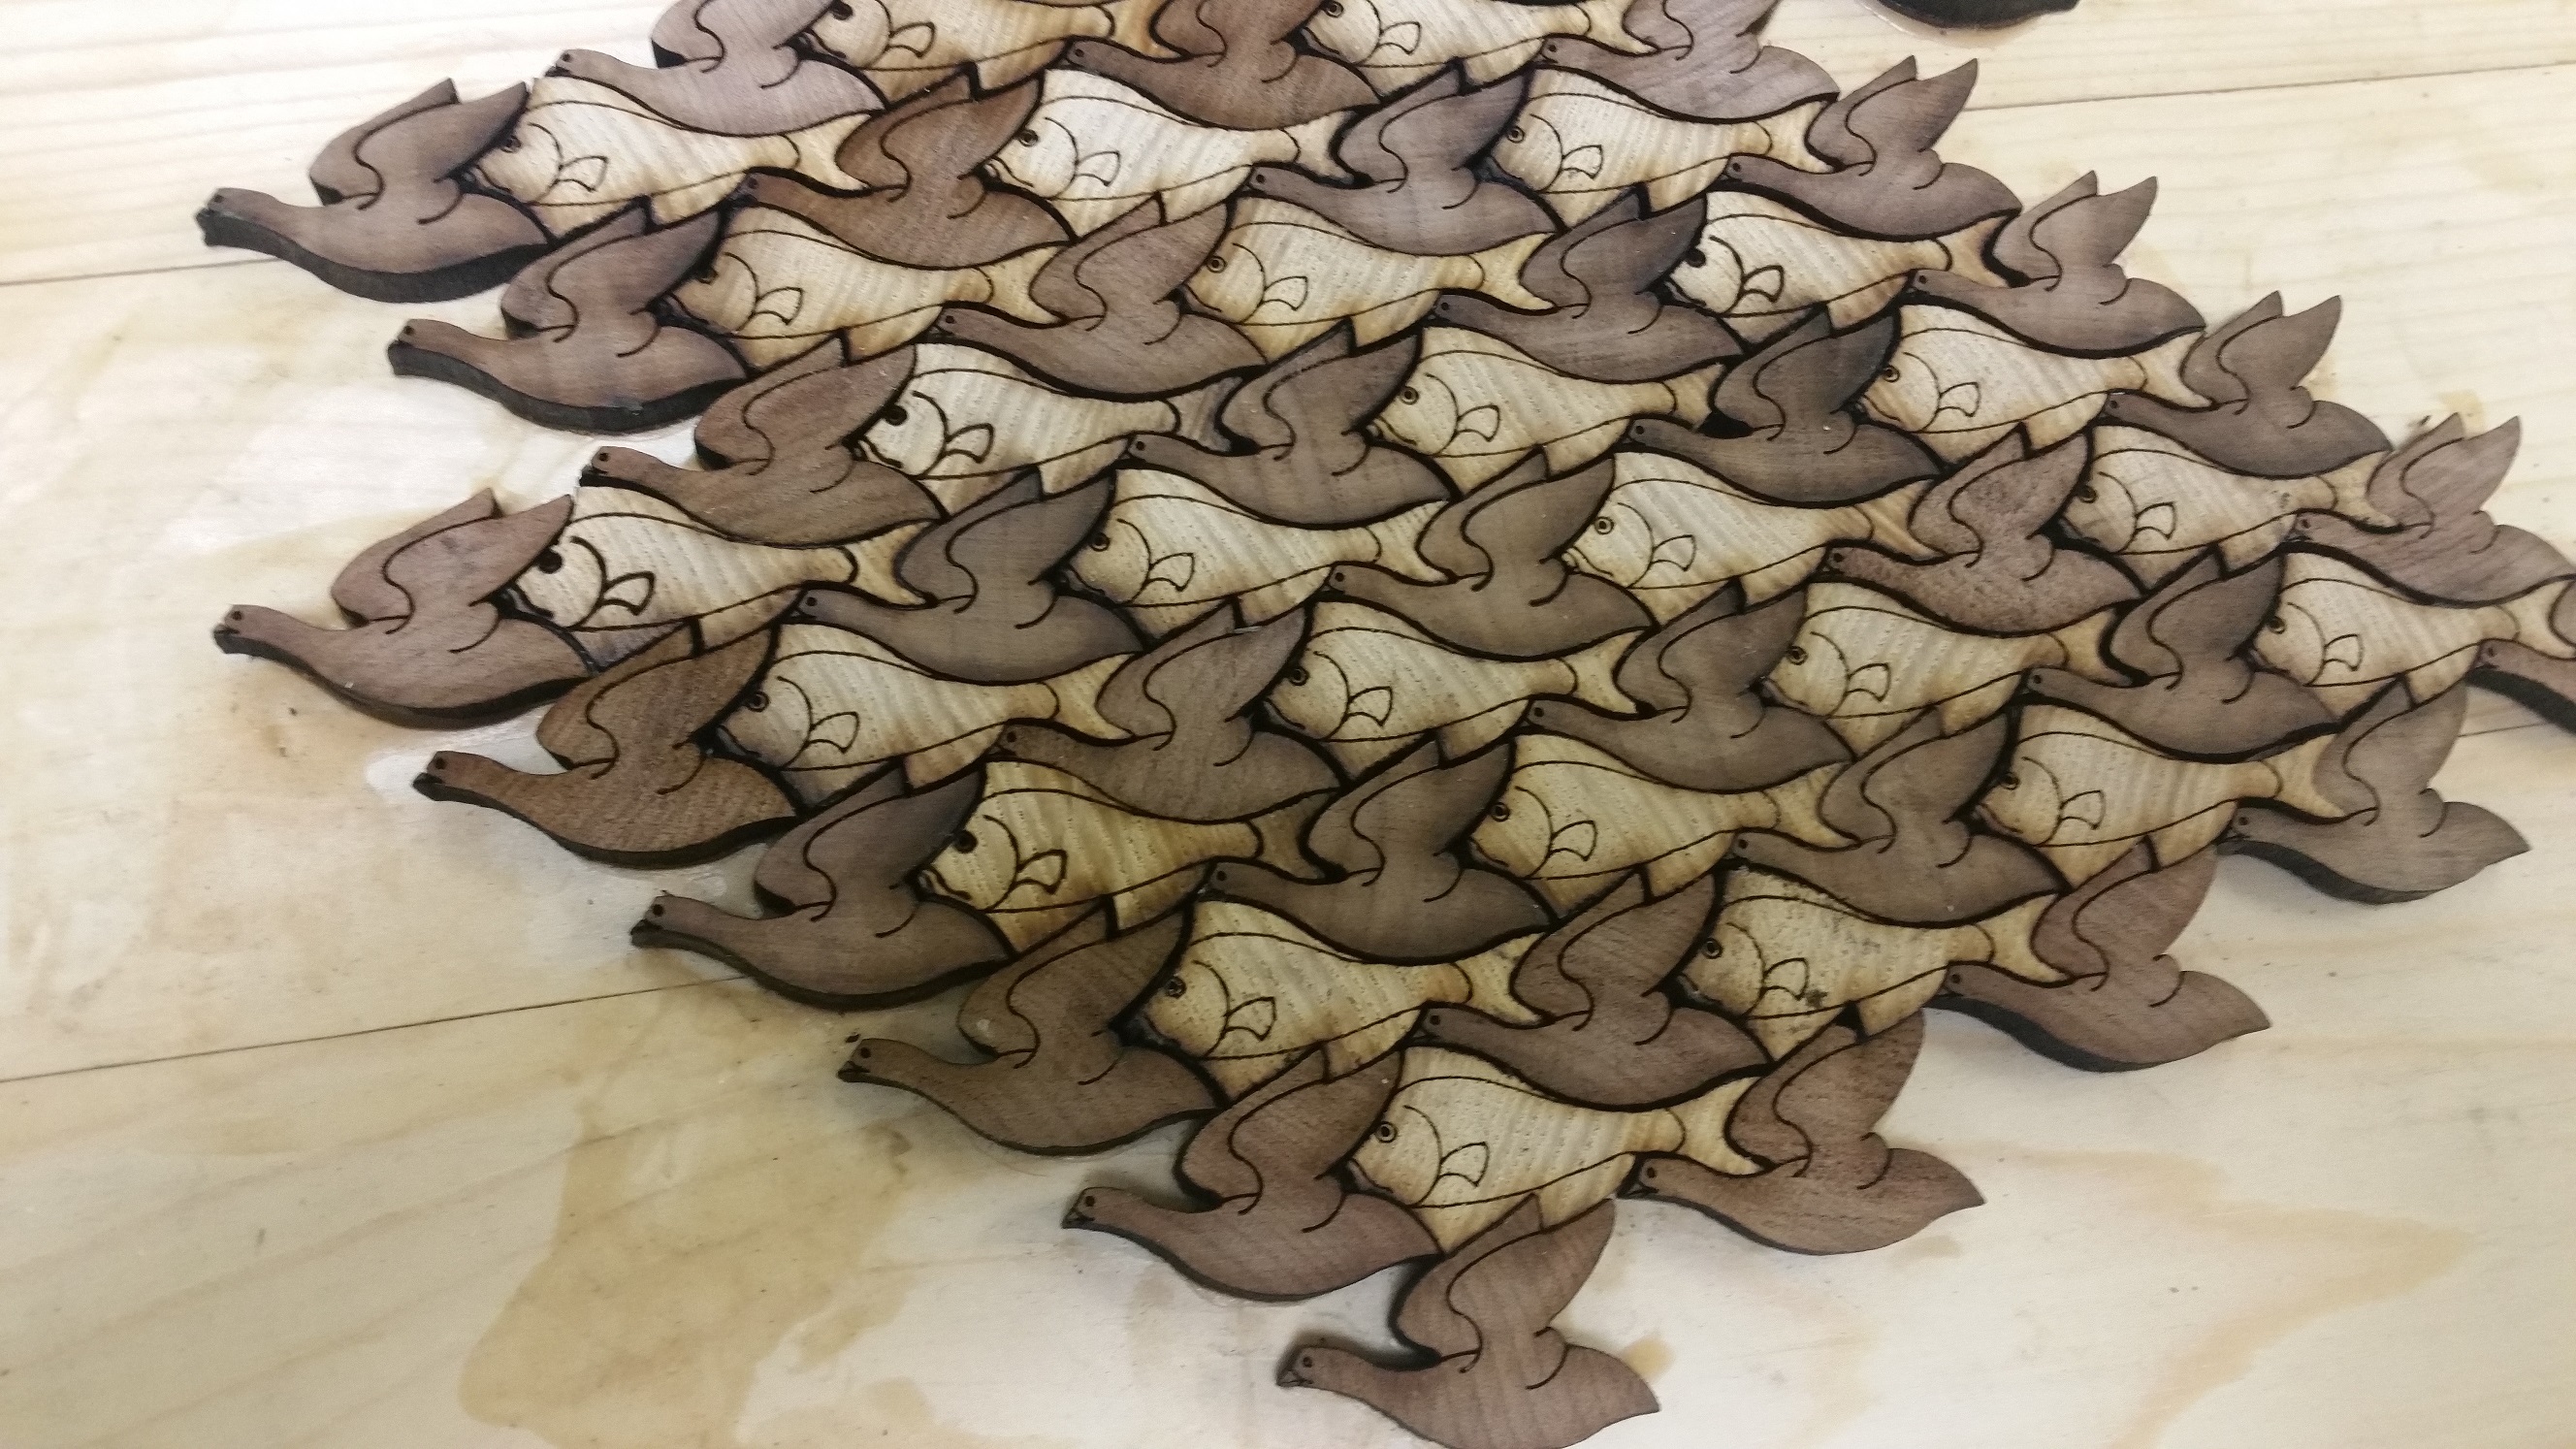
Splatspace member HL Herring is working on a tesselated cheese board, using our laser cutter. Fans of M.C. Escher will recognize the design.
It’s coming along well, and we hope to have images of the finished board soon. Nice work, HL!


Splatspace member HL Herring is working on a tesselated cheese board, using our laser cutter. Fans of M.C. Escher will recognize the design.
It’s coming along well, and we hope to have images of the finished board soon. Nice work, HL!
Rebuilding a 1967 Tube Bass Amplifier
As a beginning bass guitar student, I had been on the lookout for a “decent” amplifier for a few months. My instructor, as well as various sources online, had suggested that most commercially-available amps in the 2-300 hundred dollar range were “okay,” but that I should probably look for a better used amp or just build one myself.
The Harmony models 420 or 525 and its parent Supro Thunderbolts kept coming up in my searches as good, classic tube amps. The circuit diagrams I found didn’t look too complex, and suggested that even if I could find one in very poor condition, that I could probably rebuild it piece by piece if I had to. I found one on Ebay that had been made after the switch to solid-state rectification (which makes for simpler circuits and fewer tubes) and ended up picking it up for about $150.
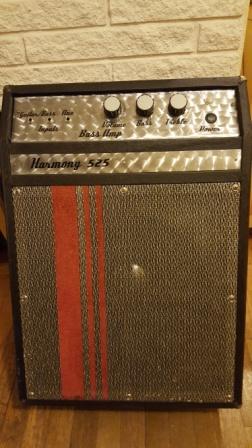
The big box arrived at my workplace. It was much larger than I had guessed from the images online, and pretty banged up. It was also full of spiders. After removing the electronics chassis, speaker, and grille, and evicting the spiders, the parts looked like this:
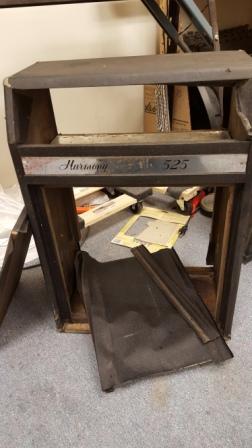

(There’s a sign on top of the speaker warning other members of Splatspace of the danger of electrocution if they mess with it. For those who don’t know, the voltages and filter caps in a tube amp’s power supply can be lethal.)
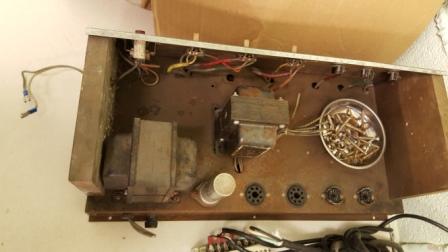
The first thing I did was cut off the unpolarized, ungrounded power cord, roll up the tubes (2 12AX7’s and 2 6L6GC’s) in bubble wrap and put them away, then test the power transformer for continuity. It looked good, as did the speaker (8 ohms, no rips or tears in the cone.) Something about the output transformer looked “off”, but I pushed that away until later.
Another member helped me with choosing and buying replacement electrolytic capacitors to replace the big silver “can” capacitor used in the power supply. Meanwhile, I scavenged and installed a modern 3-prong grounded power socket:
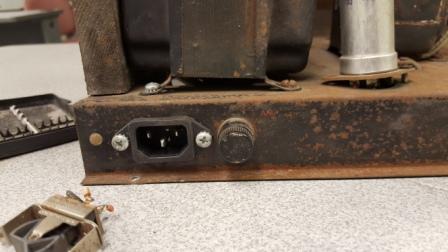
The wiring underneath was all point-to-point via terminal strips, which made subbing in new parts very easy.
Physically, I had to make some decisions about the cabinet. In keeping with my usual repair ethos and aesthetic, I wanted to keep as much original material as possible, and re-use scavenged materials whenever possible. (Except for the spiders.) I had no intention of keeping it original or vintage for resale value, I just wanted an amp that worked well and that would give me an education along the way. Before doing any cabinetry I had to answer some questions like “how many holes in the Tolex covering are too many?” and “Is rust a problem, or a charming historical patina?” (It’s a charming patina.)
I stripped off the Tolex where it was flapping in the breeze and cleaned mildew and cobwebs off of the wood below, using wood glue to repair some parts that were separating. I reglued the Tolex with contact cement, and repaired the holes bit by bit with the same repair compound I use on my leather jacket. I worked it over a couple of times with Pecard’s leather stain. (The sunburned circle on top where someone left a beer can sitting for 20 years will always be visible; I tell everyone that it’s not a bug, it’s a feature.)
I also designed and 3D-printed some rubber feet with Ninjaflex elastomer material since all but one of the original metal feet were missing.
I was fortunate to be able to retain the grille cloth with its distinctive red velvet racing stripe. Laying it facedown on towels, spraying it heavily with a non-bleach household cleaner, and then sponging it from behind flushed out most of the spider poop, lightened it by about 12 shades, and didn’t cause any further damage.
The nameplate and control panel were in bad shape. A couple of the pits were nearly a millimeter deep.
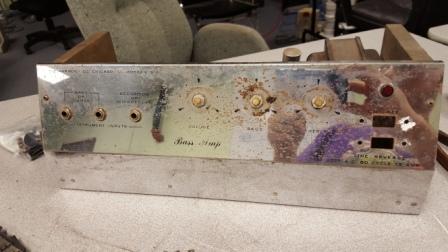
I decided to ditch the control panel because I really didn’t want to sand that chrome, and the “line reverse” switch was no longer needed with a modern power cord. I decided I could keep the nameplate and just flip it over to avoid the worst of its pitting. After sanding I put a “fishscale” pattern on it with fiber discs, and painted on a new name with a vinyl-cut stencil:
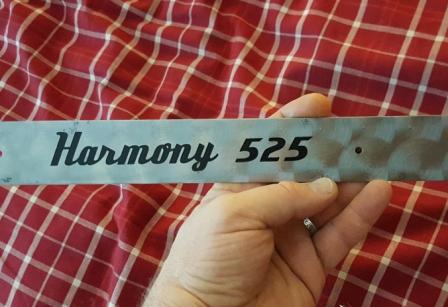
The name plate was the first part I completed that gave me hope that the amp might actually LOOK decent as well as working. I cut the new panel from the chassis of an old desktop computer contributed by another member, bent it on Splatspace’s metal brake, cut the holes, and did more finishing/stenciling:
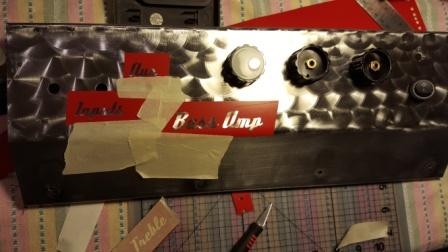
The knobs were from an old Zeiss electron microscope that actually came from my workplace, via Durham’s Scrap Exchange. The 1/4″ jacks came from the Scrap Exchange from an ancient but apparently unused piece of mono sound equipment. The power switch was scavenged from Splatspace’s “boneyard” of old parts, and the power indicator lamp (not shown here) is actually a single blue LED behind a 3-D printed transparent, faceted bezel I designed and printed. I planned to keep three inputs as it had before, but trade the “Accordion” input for an auxiliary input via an impedance-matching transformer, for use with a phone or mp3 player’s earphone output.
As I read more about amplifiers and tubes, I realized that at some point in the last 50 years someone had replaced the output transformer with one intended for a PA system, and that the impedance ratio was not correct for the (2) 6L6GC output tubes. Also, I found out what the whitish spot inside one of the 12AX7 pre-amp tubes meant: the “getter” was oxidized and the tube was shot.Both the tubes and the transformer were still available, so that part was easy.
To end the story, after new tubes, new caps, checking all the old and new connections, I got this:

I have a little punch list left: I’m still playing with the aux jack wiring, I need to finish leveling off the worst Tolex holes and gouges on the back edges, and the corner protectors could use some more buffing. Also, I just copied the original bass pot wiring, which turned out to be backwards, and the gray caps on the knobs don’t match the panel; they need buffed metallic covers.
My instructor and other players who are better than I (i.e., pretty much everyone on the planet) say that it has a great, warm sound.
All I can tell is that, coupled with the flatwound Danelectro Danoblaster I rebuilt last year, it sounds great, and it makes my house shake and the dogs run and hide. For my first-ever foray into amplifiers, I’m very pleased with my final ~$250 result. Many thanks to all the members of Splatspace and online forums who made helpful suggestions.
One other thing: because I scavenged the control knobs from the old electron microscope, the volume on this amplifier now goes to “Z”.
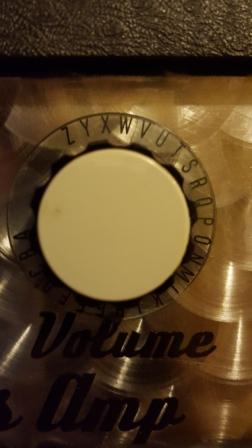
IT GOES TO Z.
On Tuesday March 14 a few Splatters helped out at Creekside Elementary School’s Science Night. This was just one event in the Splat’s ongoing program of volunteer work with schools and other institutions to foster STEM education.
There were many presenters from all over the Triangle, most of whom we never got to see because we were face-down in a PCB mill and Squishy Circuits all night.
We had a lot of fun in spite of a malfunctioning extruder on our Makerbot.
Pics from the table:

Playing with Squishy Circuits (conductive and non-conductive dough):


And here’s our Mantis printed circuit board mill, milling out a “commemorative plaque”:


(More information on Squishy Circuits can be found at:
http://courseweb.stthomas.edu/apthomas/SquishyCircuits/
and the Mantis mill is described at:
This Tuesday, Feb 21, the members of the circuit-bending rock band CMKT4 dropped by for a workshop on building peizoelectric contact microphones. We had a huge turnout and it was absolutely a blast!
A peizoelectric mic is a very simple device, but CMKT4 has worked out all the kinks to ruggedize the design and lower the cost (bottlecaps!)
They started out by telling us how to optimize our chances of soldering to the peizoelectric element:

After that, everyone got to work and built their mics.


Under all those bent heads, work was going on:

Finally all the mics got plastic-dipped and went into our fume hood to dry:

During the drying time CMKT4 performed a set with both traditional rock instruments and circuit-bent toys.


Many thanks to CMKT4 and everyone who came out for this event!
Last weekend several Splatspace members, friends-of-members, and one child-0f-member volunteered as mentors at Efland-Cheeks Elementary School’s Robot Camp. Efland-Cheeks Elementary School, a Title I school in rural Orange County, was awarded a 2010 Toyota Tapestry grant to integrate robotics into the 5th grade science and literacy curricula.
Robot Camp is one component of the robotics program at Efland-Cheeks. During one of the free, day-long Robot Camp events, 5th-grade students design, build, program, and de-bug Lego Mindstorms robots and then pit them against each other in competition. It is a chance for them to use and apply the “force and motion” portion of their science curriculum, as well as get excited about science and technology.
As Robot Camp is free, it is entirely dependent on volunteer support. Volunteers act as mentors to guide the teams from start to finish. It’s a hugely rewarding experience for students and mentors alike, and we’ve heard that it’s the biggest topic of conversation at the school for days afterward. Students eagerly sign up for the camps, willingly spending their Saturdays at school. Here are just a few pics.
There was planning-

There was building-

There was programming-

There was testing and debugging-

And finally there were ROBOT FIGHTS!


Mass robot carnage aside, it was a great time for everyone. Splatspace is going to be a regular presence at these events, and we hope to see some of these kids take this inspiration and run with it as they grow up.