


This weekend, we’re going to be taking a look at a simple way to create wireless power using electromagnetism. You can learn more about wireless electricity here. So not only is it a cool project to impress your friends, it’s also a great way to learn the basics of electromagnetism!
 What you will need:
- 1k ohm resistor (brown, black, red)
- Single LED
- 30 AWG Magnet Wire
- NPN Transistor
- AA Battery (and holder)
- Soldering Equipment
- Small Toy Lamp
Step 1:
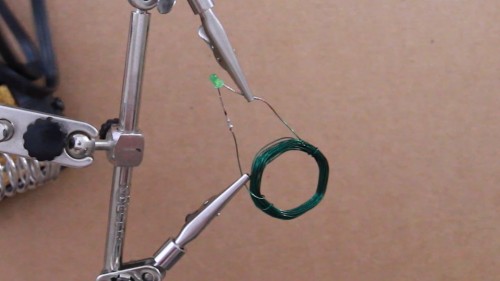 The first thing we need to create is to create the receiving coil (the coil that receives the electromagnetic charge). To do this, you want to take your magnet wire, pull out about an inch to create the first lead, then start wrapping it around the handle of a large screwdriver. Approximately 30 wraps is a good place to start. Then pull out another inch before cutting the wire to make the second lead. Slide the coil off the handle and wrap the leads once around the coil to hold the coil together.
With the coil made, we next want to solder an LED to it. In order for the leads to make a good connection with the LED, we will need to burn (or scrape with scissors) the plastic coating from each lead. After that, you can solder the legs of the LED to each lead of the wire (the direction doesn’t matter).
 Step 2:
The next thing we need to create is the inducer coil. This is what creates the electromagnetic field that is then passed on to the receiving coil. To make it, we start out the same way we did with the receiving coil, except after 15 wraps, pull out about an inch of wire, and then continue wrapping the remaining 15 turns of wire. Slide the coil off of the handle, wrap the leads around the coil to hold it together, and then use a lighter to burn the coating off both of the leads as well as the center lead.
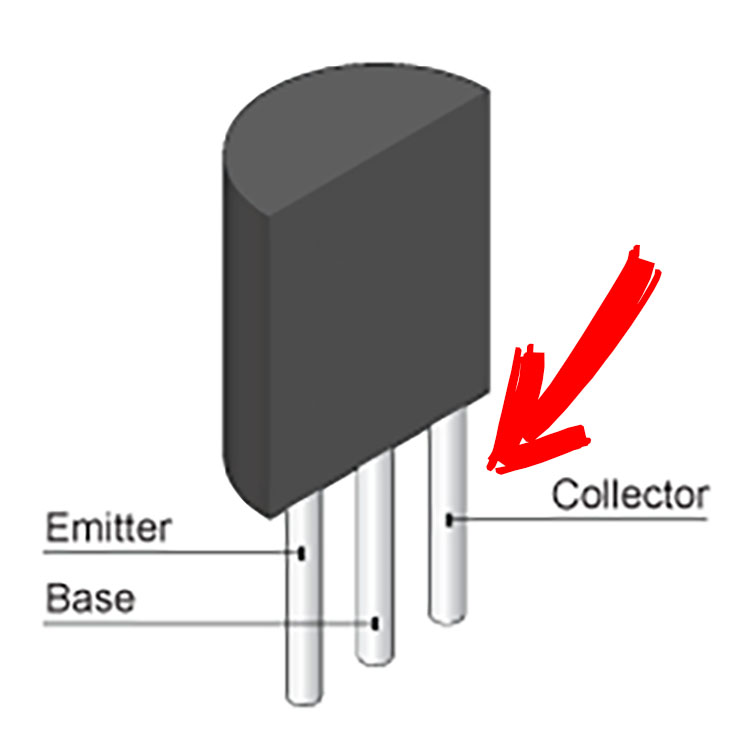
Now we need to solder the necessary parts to the coil. Take the transistor, and using the diagram to your right, find the “collector” leg and solder it to one of the outside leads. Then solder the middle “base” leg of the transistor to the 1k ohm resistor. And finally, solder the other end of the 1k ohm resistor to the other outside lead. At the moment, there should not be anything connected to the middle lead of the coil or the “emitter” leg of the transistor.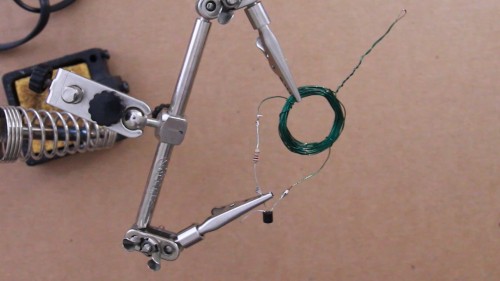
Step 3:
All that’s left to do to get this to work is to apply power. So take the AA battery and connect the negative end of it to the “emitter” leg of the transistor, and connect the positive end to the middle lead of the inducer coil. What this does is send power throughout the wire and runs it through all the coils creating an electromagnetic field around the coil.
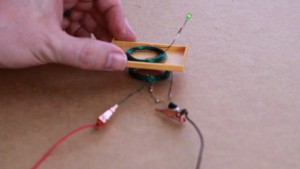 Now that the inducer coil has power, you can take the receiver coil (with the LED) and place it close the the inducer coil. The closer it gets, the brighter the LED will shine. You can even test it out by putting paper or plastic between the two coils and see how many it takes before the LED no longer powers up.